
Workshop log · Software Projects
When Hacking a TV Turns Into Home Automation
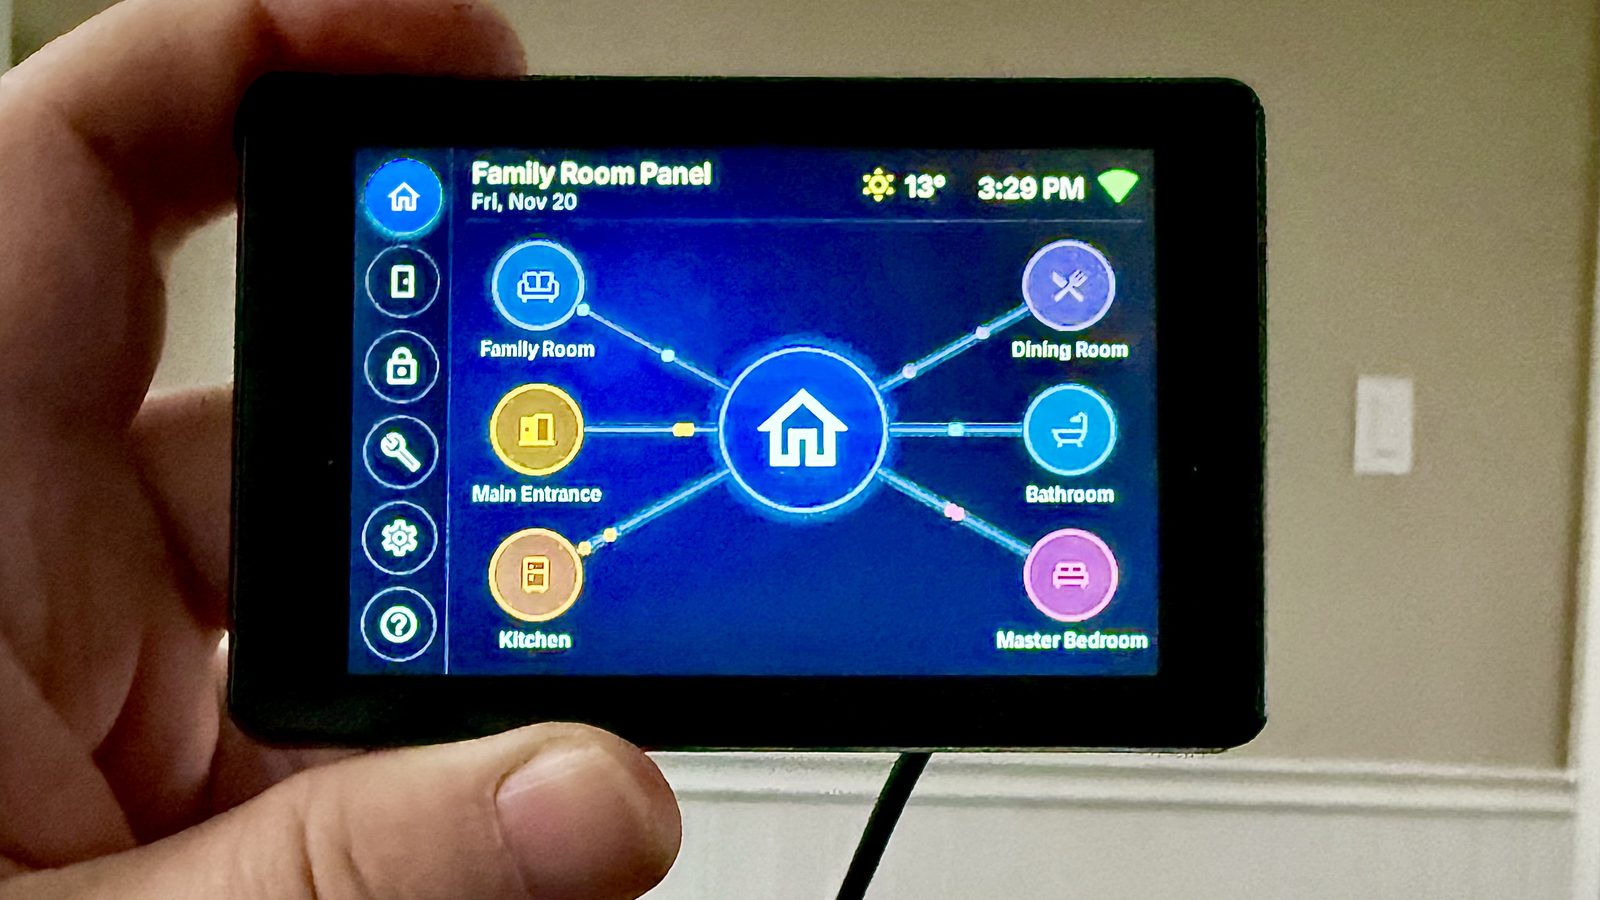
LG TVs have been getting some bad press about privacy lately. When I read ‘We know who’s in the LG household… we own the glass’ , my first thought was “The Hell You Do!” I wanted to see how much control I actually had, so I started simple: a remote control.
As with most things, as I start doing something, I wonder where I can take it. There’s no point in doing it if I can’t overdo it. The TV remote was easy, the soundbar, not so much. How do I control the soundbar? IR transmitter. How do I control it all? Server in the basement. How do I access it? PC app, Phone app, small touch panel. Lots of rabbit holes, so let’s get started.
It started with a remote
The original plan was small. I wanted to hack my LG 55UP7100ZUF and control it from my infrastructure. Not from the LG app, not through LG’s cloud. From tools in my own network.
LG’s webOS TVs have a local API, so this turned out to be very doable. A small Python service on my home server (a repurposed Lenovo ThinkStation P340 SFF that lives in the basement) now pairs with the TV once and then talks to it directly. Power, inputs, apps, arrows, OK, the lot. It keeps a connection open while the TV is on, so a button press takes about 20 milliseconds. That’s faster than the actual remote.
However, when I pressed Volume Up, nothing happened. Bugger!
The soundbar problem
My TV sends its sound to a Bose Solo Soundbar Series II over an optical cable. Optical carries audio and nothing else. There’s no way for the TV to tell the soundbar “louder”, so I have half a functional remote. Sigh.
The soundbar only listens to one thing: its infrared remote. So if I wanted control, something on my network had to learn to speak IR.
Why an IR Mate, and not a bag of parts
The obvious answer is a smart IR blaster, the little hockey pucks you stick on a shelf. I said no to those pretty quickly. Every one I looked at wanted its own app and its own cloud account, and I’d need one in roughly six rooms. That’s six more boxes I don’t control, phoning home to someone else’s server. Hard pass.
The other obvious answer is bare IR modules. You can get a bag of 30 transmitters and receivers for about $17, and I nearly did. The catch is that they’re just parts. Each one needs a board to run it, and the transmitter LED runs straight off a data pin, which gets you maybe 1 to 2 metres. To light up a whole room I’d need to add a transistor and a couple of extra LEDs, solder it all to an ESP32, and repeat that in every room.
Then I went looking at Seeed Studio , a shop I’ve had good service from, and found that someone had already built exactly that node. The XIAO Smart IR Mate is an ESP32-C3 with three high-power IR LEDs pointing in different directions, a receiver for learning codes, and USB-C power. It runs ESPHome , which is open source, fully local, and doesn’t need an account for anything. About US$9.50 each if you buy ten. Sold.
I did also grab a Grove Infrared Emitter and Grove Infrared Receiver while I was there, but those are for Servo, my AI rover, and that’s a story for another day.
Teaching it the remote (and getting the timing wrong)
I put my own ESPHome build on the IR Mate, pointed the Bose remote at it, and pressed Volume Up, Volume Down and Mute. It captured all three on the first try. Easy.
Then I sent them back at the soundbar, and the IR Mate’s light blinked, and the soundbar did absolutely nothing.
The codes were right. The IR Mate’s own receiver heard every one of them go out, and they matched the remote bit for bit. The problem was repetition. When you press a button on the real remote, it doesn’t send the code once. It sends it over and over, every 77 milliseconds or so, for as long as your finger is down. I was sending two or three copies, and the soundbar was treating that like a sneeze.
Mute was the first one that clearly worked, at four copies in the same rhythm as the real remote. Volume then worked at the same setting. In fairness to the volume tests, part of the problem was me. The first time I wasn’t paying attention, and the second time the show was in a quiet, deeply moving, reflective scene (the characters were asleep), so I couldn’t hear any change one way or the other. I ended up sending five up and five down during a louder scene to be sure.
Four copies is now the default, and on the web page, holding + or - just keeps sending a press every 350 ms.
One remote, two languages
This is the part I’m quietly pleased with. To me, the web page is one remote. Under the hood it’s speaking two languages:
- TV buttons (power, inputs, apps, arrows) go over the network, straight to the TV’s API.
- Volume and mute go to the IR Mate, which flashes the Bose codes at the soundbar.
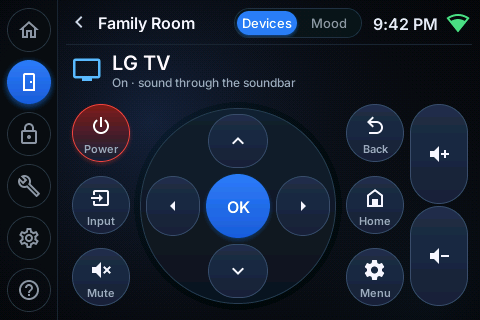
The TV remote on the panel. Power, arrows and OK go over the network. Mute and the volume buttons go out as infrared to the soundbar.
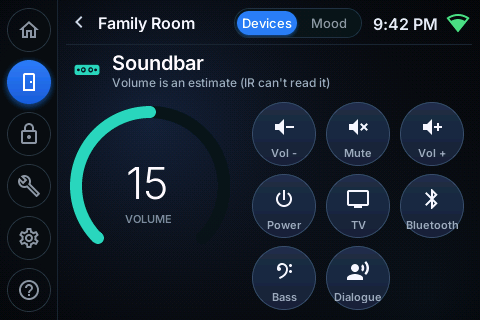
The soundbar screen. Every one of these goes out as infrared. The volume number is a guess, because IR only talks, it never listens.
Once that worked, I taught it the rest of the Bose remote too: power, TV, Bluetooth, bass and dialogue mode. There’s one quirk I’ve decided to live with. The TV turns the soundbar on and off by itself, so the soundbar’s Power button gets overruled whenever the TV is on.
Then I wanted buttons on the wall
A web page on my phone is fine. A dedicated button panel is better. I started out asking about macro pads and ended up looking at screens:
- A DIY macro pad on a Raspberry Pi RP2040, or an Adafruit MacroPad RP2040 .
- An Elgato Stream Deck , with its lovely little screen on every key, at Stream Deck prices.
- Cheaper Stream Deck clones like the Ajazz AKP153 , which people also run with open-source software like OpenDeck .
- The “Cheap Yellow Display "(CYD), a 2.8” ESP32 touch screen for about $15.
- An old phone or tablet running a dashboard.
Capacitive, not resistive
The Cheap Yellow Display comes with a stylus in the photos, which made me suspicious. It uses a resistive touch screen, which works on pressure. A finger does work, but you have to press firmly, and it isn’t very precise. Capacitive is what your phone uses: a light tap does it, and it goes where you point.
Resistive does have its fans. It’s cheaper, and it works with gloves or wet hands. But this is going on a wall or side-table, in a house, for people who’ve been using phones for fifteen years. Capacitive it is.
The board I picked
What I landed on is a Guition JC3248W535C : a 3.5" capacitive IPS screen, 480×320, with an ESP32-S3, 8 MB of PSRAM and 16 MB of flash, in a shiny black case, for about $28 CAD. I had a coupon, so mine cost $24. The reviews were full of people running it with ESPHome and Home Assistant, and one called it “vastly superior” to the Cheap Yellow Display. It also has native USB, which leaves the door open to using it as a USB macro keyboard later.
The catch, which I knew going in, is that its display chip (an AXS15231B on a fast QSPI bus) is less common than the usual suspects, so setup is fiddlier. It turned out fine.
Why not a Seeed unit ? Cost. They’re nicer, and square (480×480), but they cost more. I may get one later to try out.
Why I flashed it
Out of the box it runs a demo: pictures, videos and some music off an SD card. Cute, but it’s not going to turn my TV on. To make it do my thing, it needs my firmware, so I replaced it with ESPHome, the same thing that runs the IR Mate. That means I write the screen in LVGL through ESPHome, keep the whole config in git, and send updates from the server over Wi-Fi. Before touching anything, I backed up the full factory firmware, so I can always put it back to stock.
The first flash has to be done over a USB-C cable. My cables aren’t labelled, so naturally the first one I picked up was charge-only. Of course it was.
The little screen
The design took a few goes. The first version was cute, colourful and a bit too simple. The second was full steampunk: brass, gears, a Nixie clock. I kept that one as a switchable theme, because… obviously. The one that stuck is a dark glass look, with a rail of icons down the side for Home, Rooms, Security, Tools, Settings and Help.
Each room gets a screen of tiles. Tiles for things that work are live: the TV and the soundbar in the Family Room are real right now. Tiles for things I don’t own yet are placeholders, so the layout is already there when the device turns up. Each room also has Moods, which are scenes chosen by whoever’s in the room. Think “horror movie”, “visitor lighting” or “reading”.
And the Home screen does this, which is pure decoration and I regret nothing:
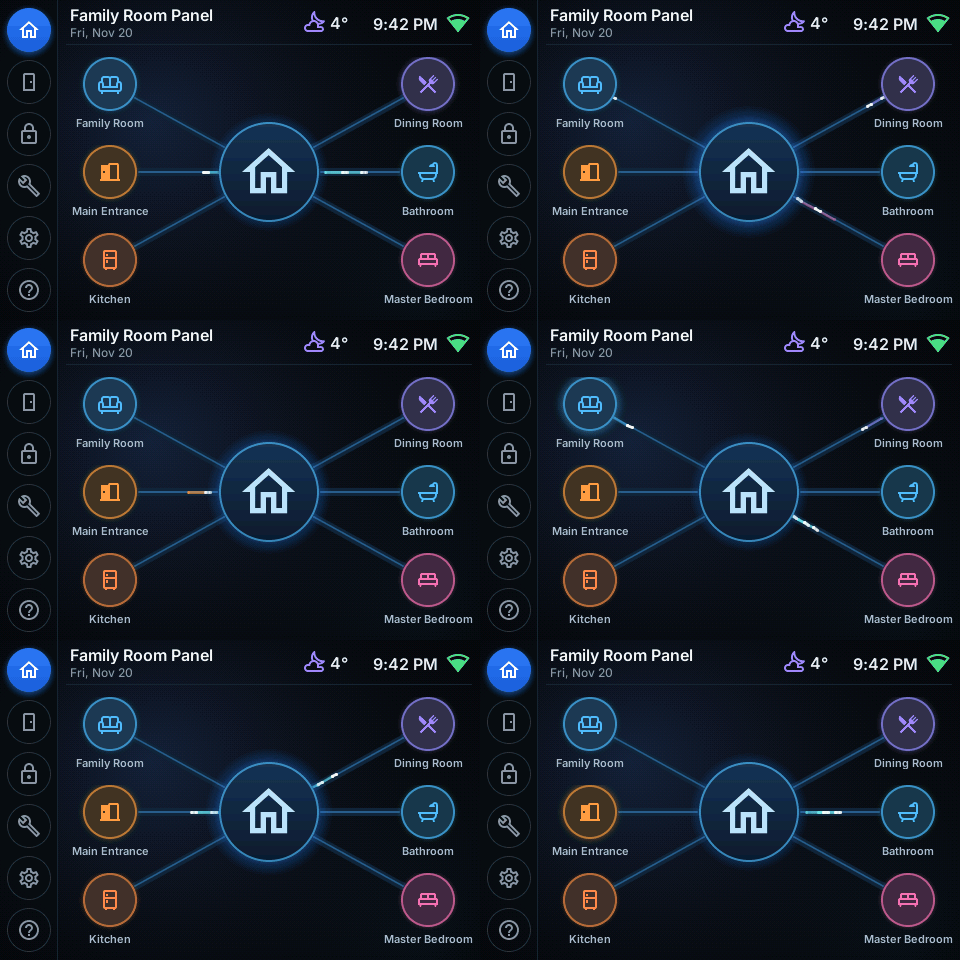
I adore these little screens. I’ll probably end up with one in every room, plus spares for whatever else I dream up. Why spend $100 or more on a Stream Deck when I can make my own for $24?
The brain in the basement
You might be asking why I’m writing my own stuff instead of using Home Assistant or Apple Home. Partly, it just happened. I started with a TV remote, then added a soundbar, then a panel, and each time the shortest path was to build on what I already had. Nothing I did was a grand plan.
But it’s turned into something I do want. The panel doesn’t talk to the TV or the soundbar. It talks to the server, and the server talks to everything else. That means the panel, my phone, a computer, and maybe a repurposed tablet one day are all just different front doors into the same brain. The moods live on the server too, so “movie night” means the same thing no matter where you press it.
It also means I can mix and match hardware:
- Today, it’s things I can control directly, over a network API or infrared.
- Next, Home Assistant goes on the server as the engine underneath. That brings Matter over Thread for new devices, Zigbee where a particular device needs it (because I can), and Apple Home on our iPhones through Home Assistant’s HomeKit Bridge (also because I can).
- And Servo, my AI rover, gets access too. That part is either a great idea or the opening scene of a horror movie.
Apple Home on its own was never going to be the brain. I don’t have an Apple TV or HomePod to act as a hub, it can’t drive an IR soundbar, and it can’t run on a $24 screen. It’s a fine way to look at the house from my phone, though, so it gets to come along.
Random Crap
The gear icon
Gives me a nerd screen (those are internal IPs, so no security lapse on my part):
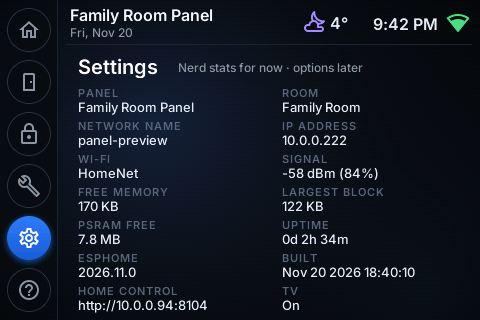
Wi-Fi signal, free memory, uptime, firmware version and build time. Real settings come later.
The Help Screen
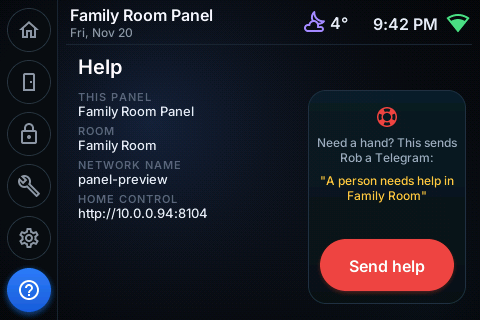
Help shows which panel and room you’re in, and the big red button sends me a Telegram: “A person needs help in Family Room”. It asks you to confirm first, so a stray elbow doesn’t set it off.
What’s next
- Home Assistant on the server, before I add any more devices, so I stop rebuilding things it already does, while keeping it out of the way for the things it can’t handle.
- Live state on the tiles, so the panel shows what’s actually happening, not just what I last pressed.
- More IR Mates and more panels, one room at a time.
- The “lived in” away mode: lamps, TVs and the odd bathroom light going on and off in a believable pattern while we’re out.
If you’ve got a TV that can’t turn its own soundbar up, you can do this too. It’s an IR Mate, a bit of ESPHome, and a lot of pressing Mute while someone else in the room asks what the F… you are doing.
Full disclosure: the Seeed links are affiliate links, so if you buy through them, I get a small cut. I bought mine before I set up the affiliate account, so it had nothing to do with why I picked them.